As admirers of art, we often stumble upon various awe-inspiring works that leave us wanting to delve deeper. One such captivating form that has piqued the interest of many is textured plaster art. Rich in depth and appealing in dimension, this three-dimensional (3D) artwork is more than just a feast for the eyes. It is an adventure that pulls us into the realm of creativity and beckons us to try our artistic hands at the medium.
For those who are curious and eager to explore the world of plaster paintings – this guide aims to provide a comprehensive understanding of developing your own textured 3D plaster art.
Embarking on the Journey: Essentials for Crafting Textured Plaster Art
For art enthusiasts intrigued by the allure of textured plaster art, creating a unique masterpiece at home is not a far-fetched dream. However, it is essential to gather the right materials before embarking on this artistic endeavor.
To initiate the project, the following tools and materials are necessary:
A Canvas: This serves as the base where your artwork takes shape. Ensure to select a good quality, stretch canvas that can withstand the weight of the plaster and paint. Canvases can be easily availed from local art supply stores or online platforms like Amazon.
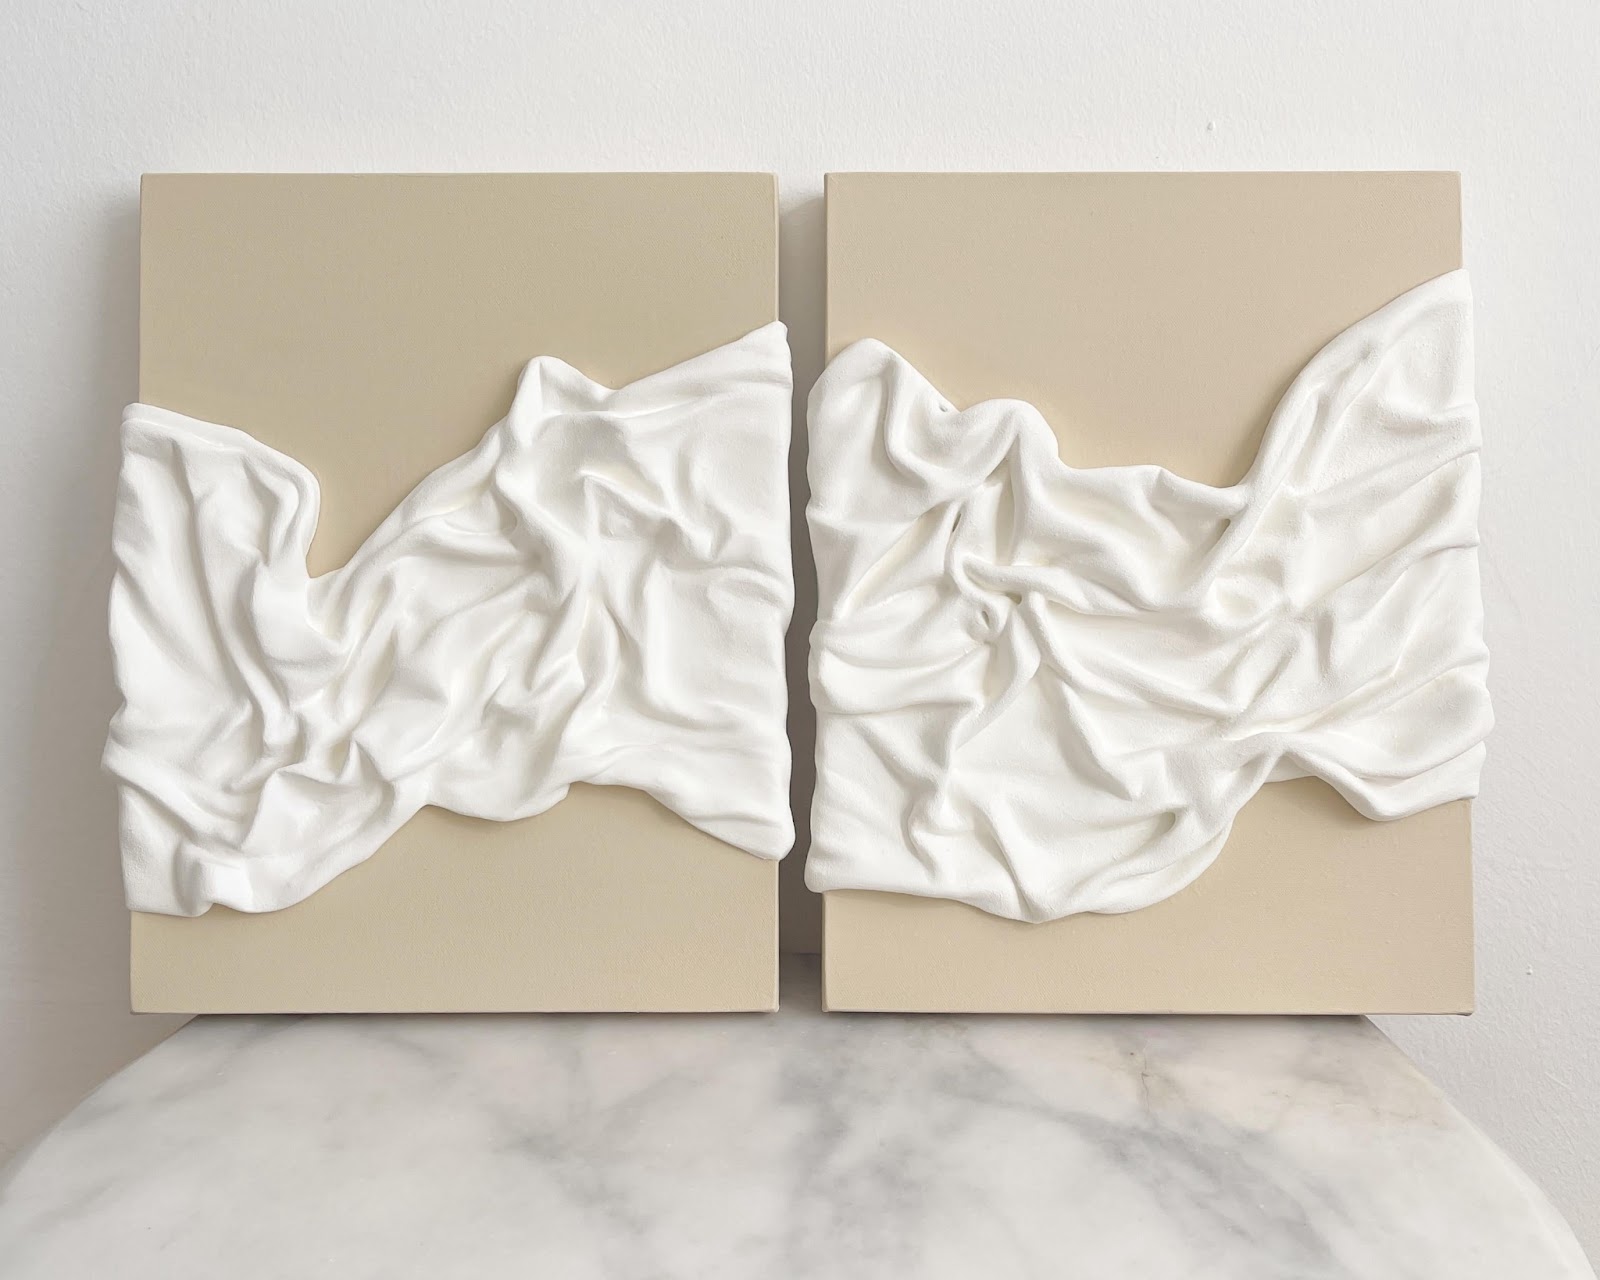
Technique 1: Crafting Textured Art with Plaster and Fabric
Art certainly knows no bounds! With unconventional materials like plaster and fabric, artists can conjure up extraordinary art pieces that defy the conventional norms of two-dimensional artistry.
Creation of Basic Structure: Cardboard/Wire
Fundamental to the process is the creation of a base that stands as a blueprint for your artistic vision. This is where cardboard or wires come into play.
To create the base shape of your design, you can use robust cardboard or malleable wires. Cut them according to the specific design you aim to achieve. Once you have the basic form, secure them in place using a hot glue gun. This step will ensure the foundation of your artwork is firm and able to support the layers of plaster and fabric that will follow.
Techniques and Tips for Crafting Masterful Textured 3D Art
Crafting textured 3D art with plaster and fabric is a project of precision, patience, and creativity. To help you achieve the best results, here are some essential techniques and tips to consider:
Step 1: Preparing the Plaster Mixture
Begin by combining the powdered plaster and water. The mixture should be smooth and slightly fluid, but make sure it’s not overly runny. The exact consistency will significantly affect the final outcome, so aim for a state that is easy to work with but still holds shape.
Step 2: Soaking the Fabric
Next, immerse a fabric strip in the plaster blend. The size of the fabric would correspond to the size of the canvas and the complexity of the desired design.
Step 3: Fabric Application
Drape the soaked fabric over the cardboard or wire shapes secured on the canvas. The base shapes help the fabric maintain its form instead of collapsing or losing shape.
Step 4: Shaping and Securing the Fabric
While the plaster-soaked fabric is still malleable, adjust and shape it to your liking. Once the desired form is achieved, trim any excess fabric. Use a hot glue gun to adhere the remaining fabric to the canvas edges, keeping the fabric and overall design intact. Exercise caution during this process to avoid distorting the achieved form.
Step 5: Setting the Design
Allow your artwork to rest and harden for a few hours. Following this, prepare a slightly thicker plaster-water blend, and gently brush it over the design. Keep in mind that the fabric remains soft and flexible at this stage, so a dense mixture could weigh down your design and make it appear flat once dry.
Step 6: Adding Smoothness
To achieve a smoother, less grainy finish, consider using a gap filler. Apply it evenly across the artwork to fill in potential crevices and imperfections. Ensure to stock enough tubes of gap filler, as layered artworks often require a larger quantity than expected.
Step 7: Adding Color
Once the artwork is completely dry, which might take up to four days, due to the multiple plaster layers applied, it’s time to add color. Use acrylic paint or spray paint, depending on your preference. For intricate details, employ a smaller brush to apply the paint, ensuring that every nook and cranny of your design is appropriately colored. Depending on the effect you aim for, you might need to apply two layers of paint to achieve an opaque look.
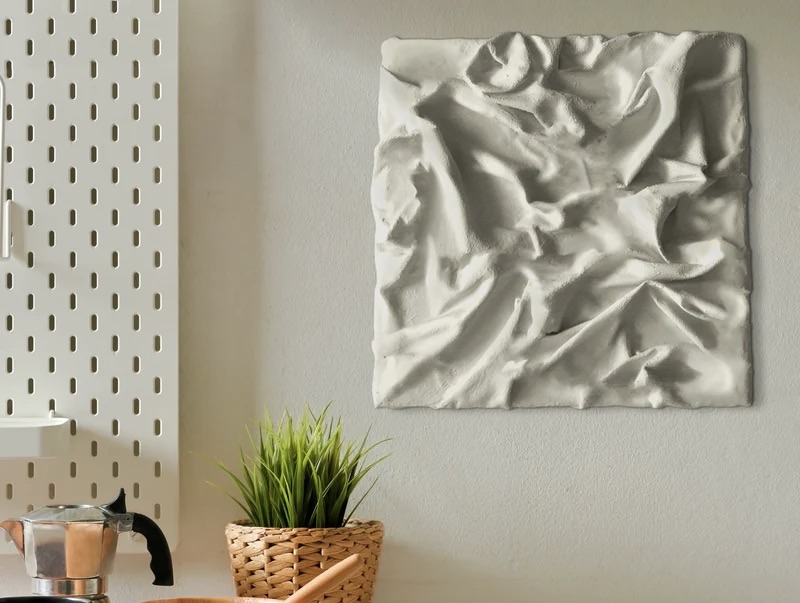
An Alternative Approach: Craft Textured 3D Art with Air-Dry Clay or Modeling Paste
For those who might not have a canvas or prefer to work with a different medium, creating textured 3D art with air-dry clay, or modeling paste offers an intriguing alternative. The process is somewhat similar, but the result is equally captivating and full of texture.
Materials Needed:
To tap into your inner artist with this method, you’ll need:
- Air Dry Clay or Modeling Paste: These mediums are easily moldable and perfect for creating detailed, textured art. You can find them at any art supply store or online retail platforms like Amazon;
- A Panel: Unlike a canvas, panels do not have thick edges and require less clay or paste. This makes them an economical choice for beginners.
Crafting the Artwork:
Creating textured artwork with air-dry clay or modeling paste involves simple yet careful steps. Here are the details:
- Roll Out the Clay: Roll the clay or modeling paste using a rolling pin. Aim to make it as thin as possible; this will help the clay adhere better to the panel and expedite the drying process;
- Prepare the Panel: Lightly moisten the panel with water. This small step can significantly enhance the clay’s adhesion to the panel. Focus on the edges to ensure a firm grip;
- Shape the Clay and Smooth the Surface: Next, shape the clay to mimic the folds of fabric. Once you’re satisfied with the design, lightly spray water over the clay again and smooth the surface with a sponge or soft paintbrush;
- Let It Dry: Patience is key in this step. Let your design dry completely. Drying times may vary based on the thickness of the clay or paste;
- Sand and Fill: Once dry, sand the surface gently to rid any rough spots. If you notice any cracks or holes post-drying, you can use a paste or filler to mend these areas;
- Add Color: Finally, the step that brings your artwork to life – painting. Use acrylic paints in your choice of colors. Depending on the depth and details of your design, you may need to apply multiple coats for an even, vibrant finish.
The Vibrancy of Oil Pastel Art
The world of textured art is not limited to plaster and clay; it also includes the vivid and versatile medium of oil pastels. Oil pastels, with their rich pigments and smooth texture, offer a unique blend of depth and vibrancy, making them an excellent choice for artists exploring the realms of texture and color.
Creating Textured Effects with Oil Pastels:
Oil pastels are not just for flat, two-dimensional art; they can be manipulated to create textured effects that resonate with the tactile quality of plaster art. Here’s how you can incorporate oil pastels into your textured art journey:
- Layering and Blending: By layering different colors and blending them, you can create a sense of depth and texture. The malleability of oil pastels allows for easy blending, resulting in a rich, multidimensional look;
- Sgraffito Technique: This involves applying a thick layer of oil pastel and then scratching away parts of the layer to reveal the color underneath, creating an embossed effect that mimics the texture of plaster;
- Combining with Other Mediums: Oil pastels can be used alongside other materials such as fabric, plaster, or clay to add color depth and enhance the textural experience.
Conclusion: Broadening the Scope of Textured Art
From plaster and fabric to air-dry clay and modeling paste, the possibilities for creating textured 3D art are boundless. With each medium offering a distinct experience and result, artists can explore diverse avenues to express their creativity. Whether you’re working with plaster or clay, remember, it is the journey of crafting that truly makes each piece a masterpiece, a personal reflection of your artistic undertaking. As you embark on this creative journey, remember to enjoy every step and let your artistry shine.